Making Photoshop Work Better for You
Posted by: Calvin Chopp
I’ve been a heavy Photoshop user for over 15 years, using it for anything from general graphic design and photo editing to web layouts and UI to digital illustrations and concept art for video games. To say the least, it’s versatile and has been around seemingly forever, at least in my lifetime.
Using Photoshop as long as I have means I’ve gotten used to how things work, and when those things change, sometimes it feels disruptive. I’m going to discuss two of these recently updated features here, and tell you how you can revert them back to how it originally worked if you so choose.
FEATURE 1: New Document Workspace
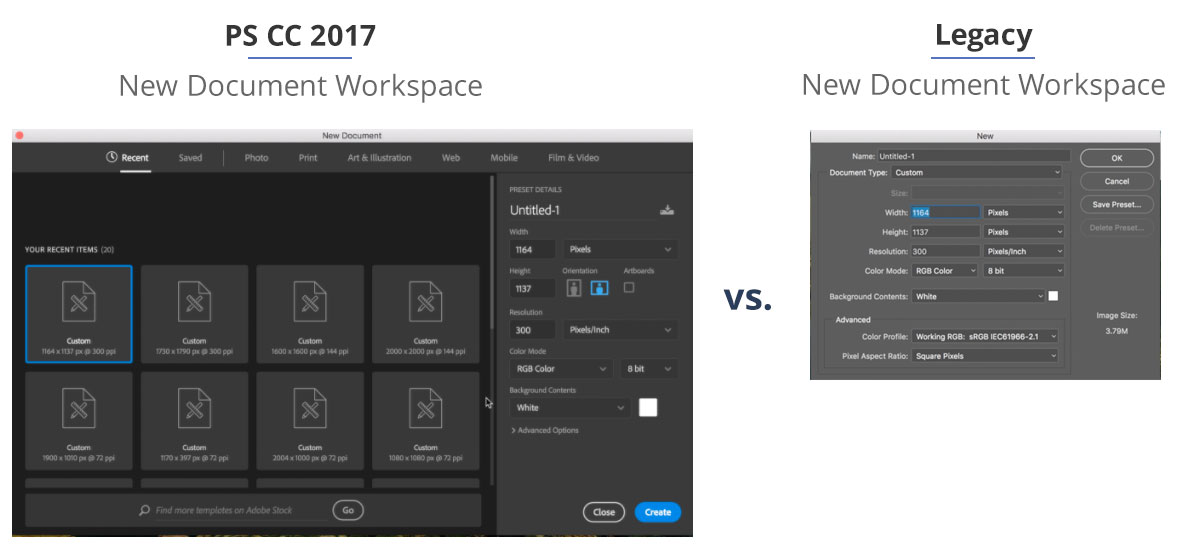
Let me start off by saying that if you’re new to Photoshop, I can see how this particular update that was recently made in CC 2017 might be useful to you. There’s a huge variety of templates to choose from now—anything from photo templates, to mobile, film and more. It also gives you the option to use a recent size item you’d created. But, for a more seasoned Photoshop user, using the software for a particular purpose, it’s a bit much. Here’s why it was for me:
- Additional load time. Granted, it’s not significant, and likely varies from machine to machine (I’m running a Mid-2014 Macbook Pro, w/ a Solid State hard drive, 16GB of RAM and an i7 Processor), but the time it takes from launching Photoshop to getting to the New Document Workspace adds nearly 2 seconds of wait time for me. That may not sound like much, but as someone who spends a huge portion of their work day in the software opening, closing, and creating many Photoshop documents each day, it is noticeable, and gets annoying.
- Too many upfront features. So many options! Too many, I feel upfront, at least for me, which I think adds to that additional upfront loading time. Packing in so many features makes it a little confusing with the way the new document inputs are laid out. If you’re tabbing through each input field (i.e. width, height, resolution, etc), in the legacy New Document workspace, you went from top to bottom, like a standard input form. In the new input form, you jump from top, down, to the right, then left to right, and down again. It seems unnecessarily confusing.
Thankfully, PS CC 2017 allows you to set your New Document workspace back to the legacy version if you’d prefer—here’s how:
Reverting Photoshop’s New Document Workspace:
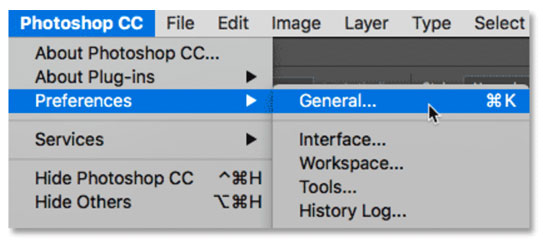
First, you need to get to Photoshop Preferences. On a PC, go up to the Edit menu in the Menu Bar along the top of the screen. Choose Preferences, and then choose General. On a Mac, go to the Photoshop CC menu, choose Preferences, then choose General. This can also be reached by hitting the shortcut Command + K.
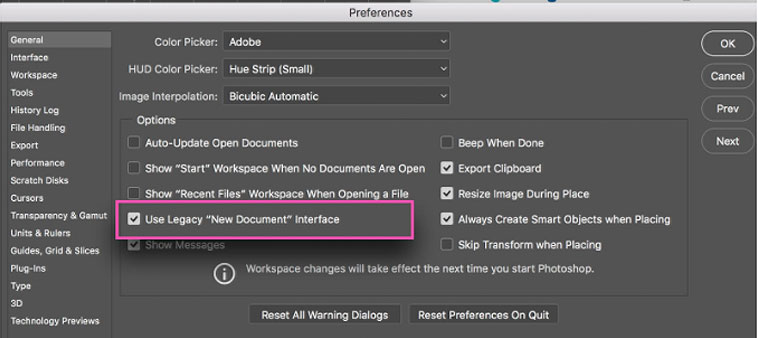
This opens the General Preferences dialog box. Within this, look for the option that says “Use Legacy “New Document” Interface, and click this option.
You’ll need to quit and relaunch Photoshop for the change to take effect.
FEATURE 2: Last Filter Shortcut
Doing web design, and UI layout and design often means repeating a similar style or filter to multiple elements. In the past, on a Mac, this was easily done by applying the most recent filter to multiple layers quickly by hitting Command + F. But in the latest iteration of CC 2017, they’ve replaced this long-standing keyboard shortcut from Command + F, to Control + Command + F, and giving the existing Command + F keyboard shortcut command to a new feature, the extended Photoshop Search functionality.
Like the New Document screen, it’s ultimately not a big deal, but I’d argue that it’s not good user experience to introduce a new feature, and replace an existing keyboard shortcut that users are accustomed to.
If you too find this annoying, you can reset your keyboard shortcut command to repeat a filter like it had before:
- Open Photoshop and navigate to your Keyboard Shortcuts. You can do so by doing one of the following:
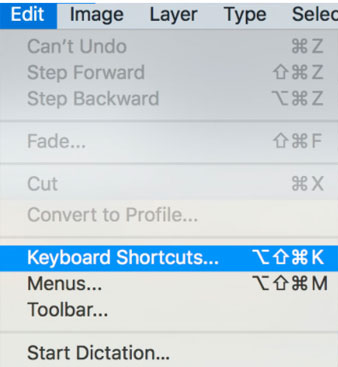
- Choose Edit > Keyboard Shortcuts

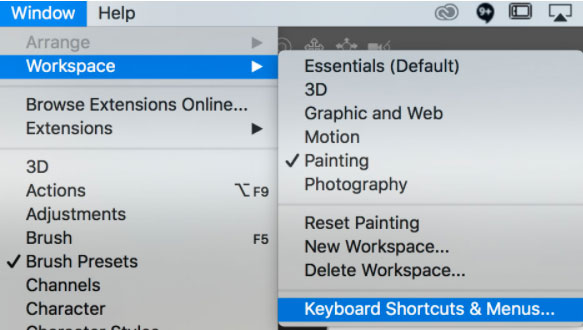
- Choose Window > Workspace > Keyboard Shortcuts & Menus and click the Keyboard Shortcuts tab.

- Choose Edit > Keyboard Shortcuts
One you have arrived at Keyboard Shortcuts,
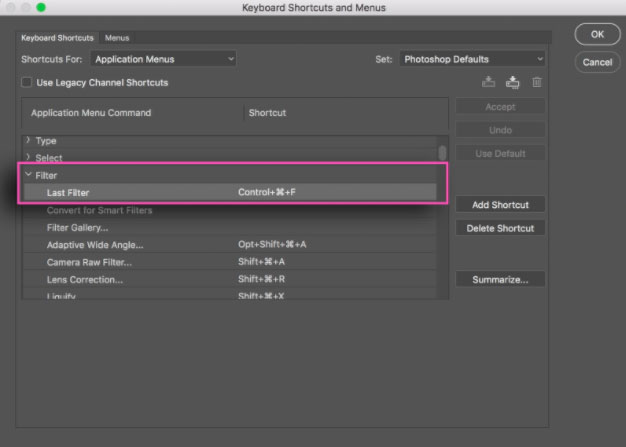
- Click on the Filter option from the list of available current keyboard shortcuts, and select Last Filter

- Click into the shortcut area that currently reads Control + Command + F, and add your desired keyboard shortcut. NOTE: you add the new desired shortcut by actually performing the shortcut, in this case, hitting the keys Command + F, as opposed to spelling it out within the input field.
- You’ll get a warning noting that by adding this keyboard command you’ll be overriding the Edit > Search functionality, which is what we wanted to do along along.
- Click OK
Overall, I’ve been pretty happy with the most updates that I’ve experienced in Photoshop over the years, with the exception of some rather minor annoyances such as these. Hopefully these tricks benefit other Photoshop users experiencing similar frustrations.
